本页内容
在日常数据库运维中,我们经常会遇到这样的场景:用户反馈某个查询响应很慢,但当我们去排查时,查询已经执行完毕,相关的执行信息也随之消失,导致无法准确定位性能瓶颈;或是在系统监控中发现某个时间段数据库负载异常,却因为缺少详细的查询日志记录,难以追溯具体是哪些 SQL/PromQL 语句导致的问题。
从 v0.15 开始(本文写作时 GreptimeDB v0.16.0 已经发布,建议使用最新版本测试),GreptimeDB 引入了慢查询记录系统表 greptime_private.slow_queries:通过相应配置,可以自动记录执行时间过长的慢查询,为 DBA 和开发者提供便捷的诊断和分析工具。无论是事后问题排查,还是日常性能监控,都能够通过历史慢查询记录快速定位问题根源。
开启慢查询记录
仅需如下配置即可开启慢查询记录:
yaml
[slow_query]
enable = true
record_type = "system_table"
threshold = "10s"
sample_ratio = 1.0
ttl = "30d"
其中:
enable设置为true表示开启慢查询记录;record_type表示记录的方式log仅打印日志。system_table记录到系统表greptime_private.slow_queries,这是更为推荐的方式。
threshold表示慢查询的耗时阈值。超过这个时间会被记录,它是一个时间范围字符串,例如 1h 表示 1 小时,1m 表示 1 分钟,这里设置成了 10 秒;sample_ratio是采样比例,如果慢查询数量较多,为了避免额外记录带来更多的性能劣化 ,我们可以设置一个采样比例,这里设置成了百分百采样,也就是全记录;ttl,当record_type是system_table,这个参数用于设置slow_queries表的数据有效期,上面设置为 30 天(默认值)。
注:单机版开启上述配置即可,集群版本需要在 Frontend 节点开启上述配置。
单机开启慢查询记录
首先请阅读单机版本的安装指南,可裸金属二进制部署或使用 Docker 启动。
首先下载默认的单机样例配置文件到本地并保存为 standalone.toml 文件:
bash
curl -o standalone.toml \
https://raw.githubusercontent.com/GreptimeTeam/greptimedb/refs/tags/v0.16.0/config/standalone.example.toml
编辑该文件,找到 [slow_query] 部分,开启被注释的配置并设置 enable 为 true 即可:
toml
## The slow query log options.
[slow_query]
## Whether to enable slow query log.
enable = true

## The record type of slow queries. It can be `system_table` or `log`.
## @toml2docs:none-default
record_type = "system_table"

## The threshold of slow query.
## @toml2docs:none-default
threshold = "10s"

## The sampling ratio of slow query log. The value should be in the range of (0, 1].
## @toml2docs:none-default
sample_ratio = 1.0
然后保存退出。
如果是二进制部署,直接通过 -c 指定配置文件启动即可:
bash
./greptime standalone start -c standalone.toml如果使用 Docker,需要挂载配置文件启动:
bash
docker run -p 127.0.0.1:4000-4003:4000-4003 \
  -v "$(pwd)/greptimedb_data:/greptimedb_data" \
  -v "$(pwd)/standalone.toml:/standalone.toml" \
  --name greptime --rm \
  greptime/greptimedb:v0.16.0 standalone start \
  --http-addr 0.0.0.0:4000 \
  --rpc-bind-addr 0.0.0.0:4001 \
  --mysql-addr 0.0.0.0:4002 \
  --postgres-addr 0.0.0.0:4003 \
  -c /standalone.toml
编者注:这里在命令行额外指定了 MySQL 和 HTTP 等协议端口,因为配置文件默认监听本地地址
127.0.0.1,容器外无法访问,因此通过命令行参数覆盖使用0.0.0.0。
集群开启慢查询记录
集群版本,我们推荐使用 Helm Chart 来部署,请先阅读安装指南。假设此时的操作环境已经安装了 GreptimeDB 的 Operator 和 Etcd 集群。
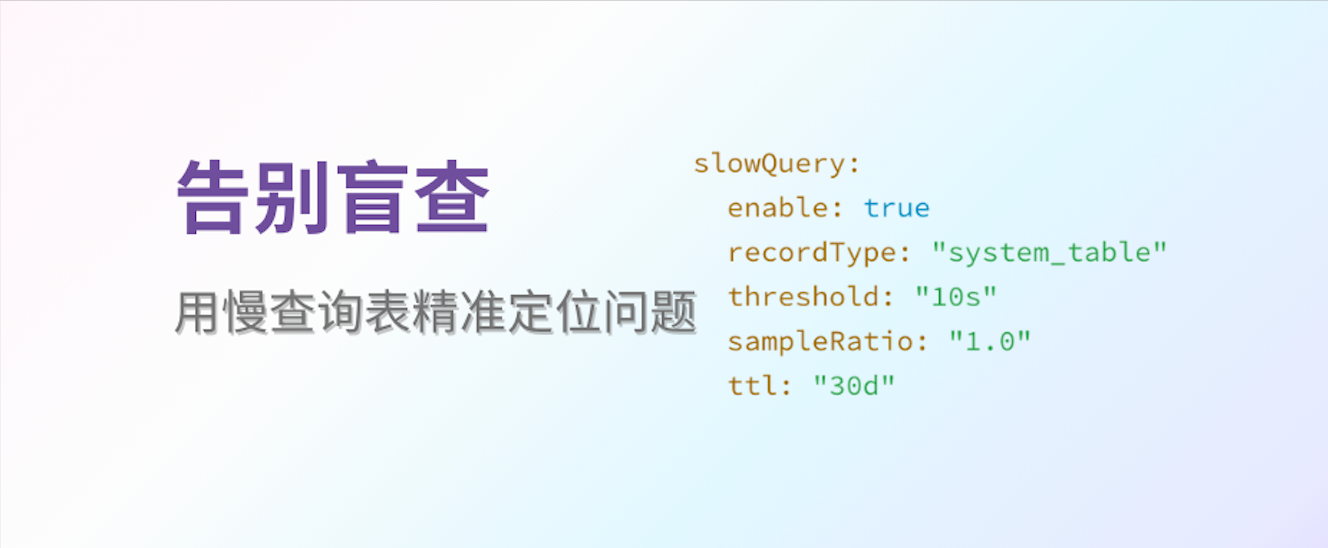
创建一个 values.yaml 文件并写入:
yaml
slowQuery:
  enable: true
  recordType: "system_table"
  threshold: "10s"
  sampleRatio: "1.0"
  ttl: "30d"
创建一个 GreptimeDB 集群并启动:
bash
helm install mycluster \
  greptime/greptimedb-cluster \
  -f values.yaml \
  -n default
确认所有 Pod 正常启动:
bash
kubectl -n default get pods预期输出:
bash
NAME                                 READY   STATUS    RESTARTS   AGE
mycluster-datanode-0                 1/1     Running   0          70s
mycluster-flownode-0                 1/1     Running   0          33s
mycluster-frontend-f8989595d-bm2pf   1/1     Running   0          39s
mycluster-meta-6964f7b654-mdp6q      1/1     Running   0          106s
接下来转发 Frontend 服务来访问 GreptimeDB 集群:
bash
kubectl -n default port-forward svc/mycluster-frontend 4000:4000 4001:4001 4002:4002 4003:4003我们可以通过检查 /config API 确认配置是否生效:
bash
curl -sS http://localhost:4000/config |grep slow_query -A5正常情况下应该配置输出为:
bash
[slow_query]
enable = true
record_type = "system_table"
threshold = "10s"
sample_ratio = 1.0
ttl = "30d"
验证慢查询记录
用户已经通过上述步骤成功设置了单机版或集群版的慢查询记录,我们可以模拟下慢查询,通过 MySQL 客户端访问 GreptimeDB 4002 端口:
bash
mysql -h 127.0.0.1 -P 4002执行一个慢查询为例:
sql
WITH RECURSIVE slow_cte AS (
    SELECT 1 as n, md5(random()) as hash
    UNION ALL
    SELECT n + 1, md5(concat(hash, n))
    FROM slow_cte
    WHERE n < 1000000
)
SELECT COUNT(*) FROM slow_cte;
这个查询用递归 CTE 从 1 迭代到 1,000,000,每步基于上一步的哈希计算新的 MD5,最终只统计生成的行数。
这个查询在笔者的机器上要耗时 1 分多钟:
sql
+----------+
| count(*) |
+----------+
|  1000000 |
+----------+
1 row in set (1 min 0.42 sec)
接下来查询 greptime_private.slow_queries 表即可看到记录的慢查询信息:
sql
SELECT * FROM greptime_private.slow_queries\G;输出结果为:
sql
*************************** 1. row ***************************
        cost: 60394
   threshold: 10000
       query: WITH RECURSIVE slow_cte AS (SELECT 1 AS n, md5(random()) AS hash UNION ALL SELECT n + 1, md5(concat(hash, n)) FROM slow_cte WHERE n < 1000000) SELECT COUNT(*) FROM slow_cte
   is_promql: 0
   timestamp: 2025-08-20 07:07:08.300677
promql_range: 0
 promql_step: 0
promql_start: 1970-01-01 00:00:00
  promql_end: 1970-01-01 00:00:00
1 row in set (0.03 sec)
可以看到 GreptimeDB 自动记录了这个慢查询,并提供了以下信息:
cost字段是耗时,单位为毫秒,整个查询耗时大于 1 分钟;query字段是原始查询的 SQL 或者 PromQL 字符串。拿到这条 SQL 就可以进一步利用EXPLAIN和EXPLAIN ANALYZE等进行分析(查看文档);is_promql,promql_range,promql_step,promql_start和promql_end记录 PromQL 的慢查询信息,比如查询的start,end和step等参数;timestamp是慢查询发生的时间点(示例为 UTC 时间)。
总结
本文展示 GreptimeDB 慢查询自动记录功能。从 v0.15 开始可以通过系统表和配置自动记录 SQL 和 PromQL 慢查询,方便诊断分析、排查和监控性能问题。此外,GreptimeDB 企业版进一步集成了自动查询性能分析与建议改进的可视化界面。
了解更多,欢迎联系我们(添加小助手微信:greptime)。

